By default, only admins can set user roles on Discord servers. However, it would be a good idea to let users pick their own roles as it would shed off some responsibilities from the admins. While there is no native option to do so in the Settings, you can allow users to self-assign roles on Discord servers easily with the help of bots. Let’s see how.
Allow Users to Self-Assign Their Roles on Discord Servers
I’ll walk you through the entire process with an example. Here, I have a server called Rubic’s Cubers where people can talk about Rubik’s cube algorithms. But there are different methods like CFOP, Roux, and ZZ. As each user may choose a different method to solve the cube, I want users to select a method themselves. So people who have selected the CFOP role can access all the channels which discuss CFOP and so on. Here is how I have done that.
1. To allow users to assign roles on Discord themselves, we should create those roles first. To do that, you need to open Discord, select the server and click on the server name in the top right corner. Then in the drop-down menu, click on the Server Settings option.
2. In the server settings, select Roles in the sidebar and click on the + button to add a new role.
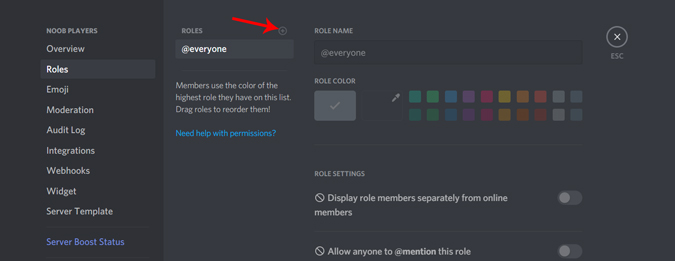
3. Here you can give a name to your role and also set the permissions they have on your server. Once done, click on Save Changes.
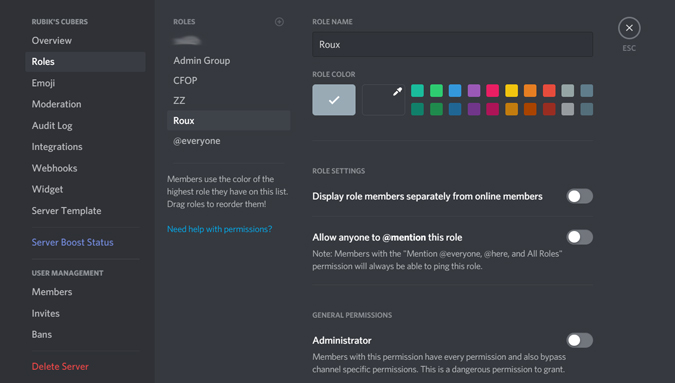
4. Now you have roles and the permissions for what users in those roles can access. All we need to do now is allow people to assign these roles to themselves. To do that, open the MEE6 Discord bot website and click on Add to Discord. In the pop-up that opens, log in with your Discord account.

5. Then Authorize MEE6 to access your account.
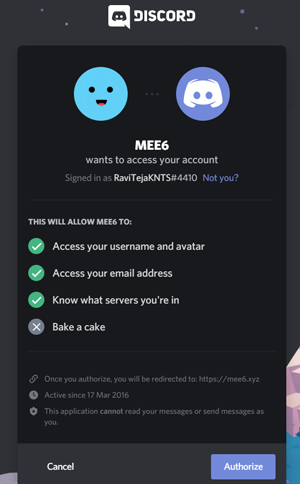
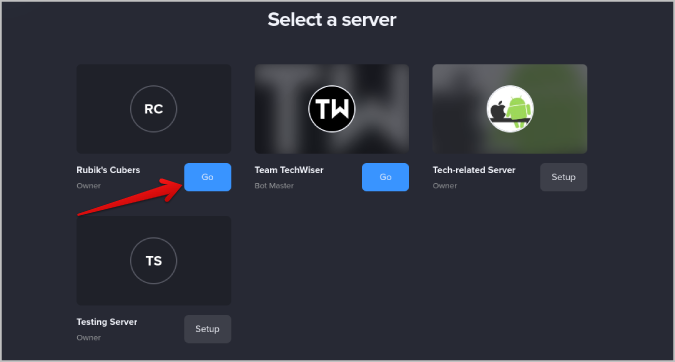
6. Now select the server on which you want to enable self-assigning roles by clicking on the Setup button. That will install the MEE6 bot and that server. Once done, click on the Go button to open the MEE6 Dashboard.
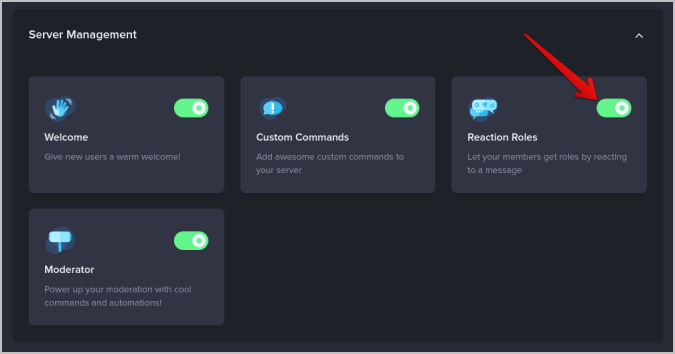
7. After logging in, select Reaction Roles plugin in the Plugins section under Server Management.
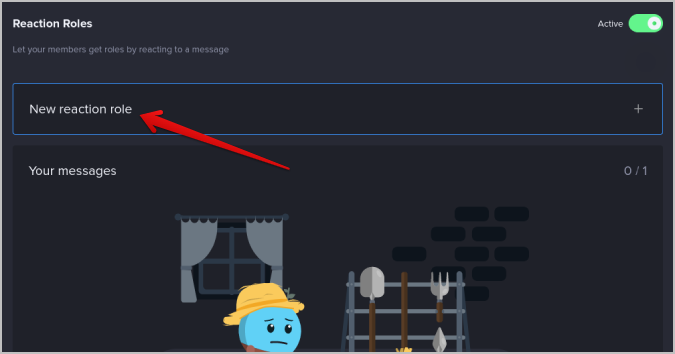
8. Now click on the New reaction role button to start creating a reaction role.
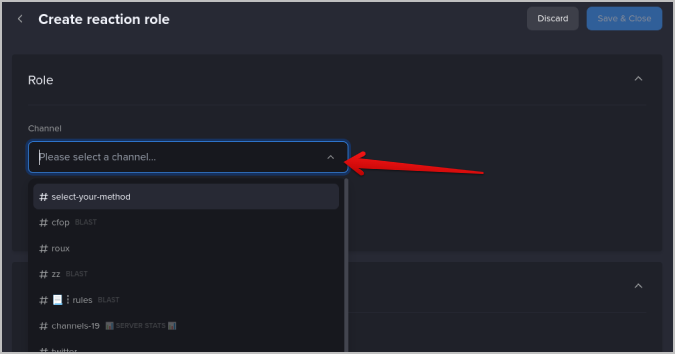
9. Now select the channel where users can assign roles. Normally, #Welcome, #Select_role, and #Get_Started are a few examples of the channels.
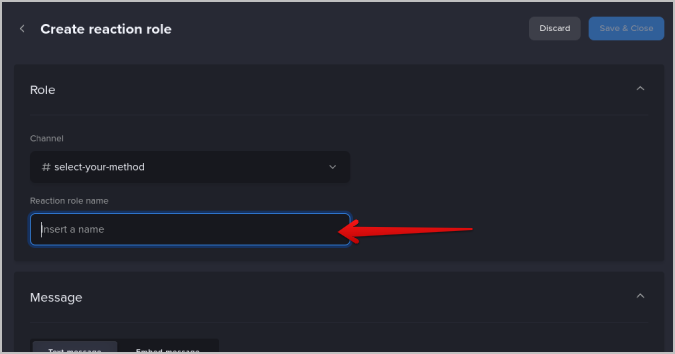
10. Then give a name to your reaction role.
11. Now in the reactions and roles section, click on the Add reaction button and select an emoji as a representation for that reaction.
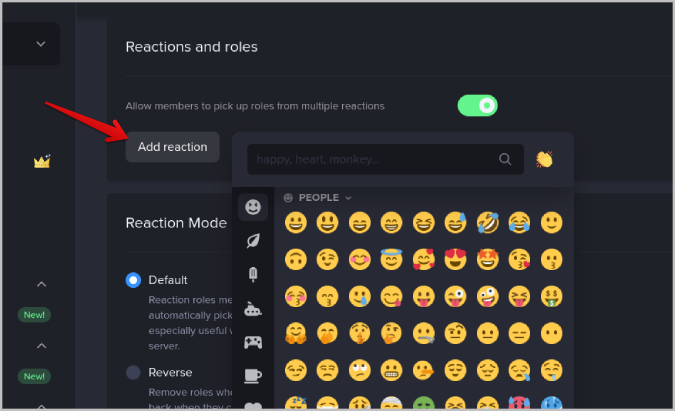
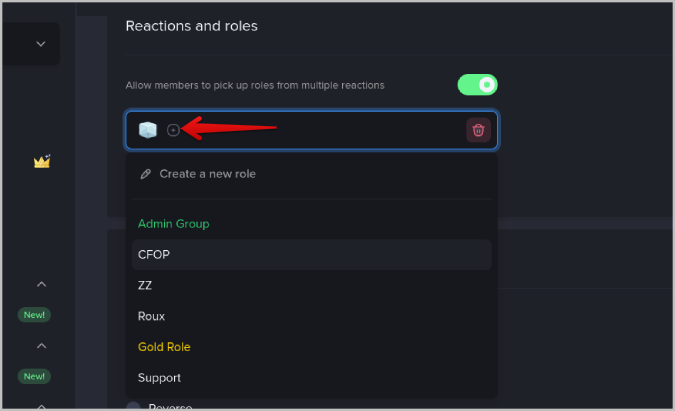
12. Once you have added the emoji, click on the Plus + icon beside it and select the role. You can select multiple roles or a single role in that reaction. Users who select that emoji will be assigned to all the roles in that reaction.
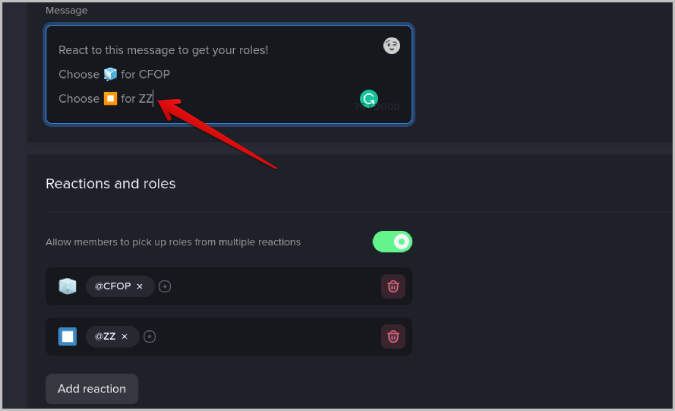
13. Similarly, you can add multiple reactions. By default, you can add 2 reactions in the free plan. If you want to add more, you need to upgrade to a MEE6 Premium plan.
14. Now in the Messages section, explain to people that they have to choose any role. And also explain which emoji means which reaction. So that users can choose an emoji and get assigned to the roles associated with that reaction.
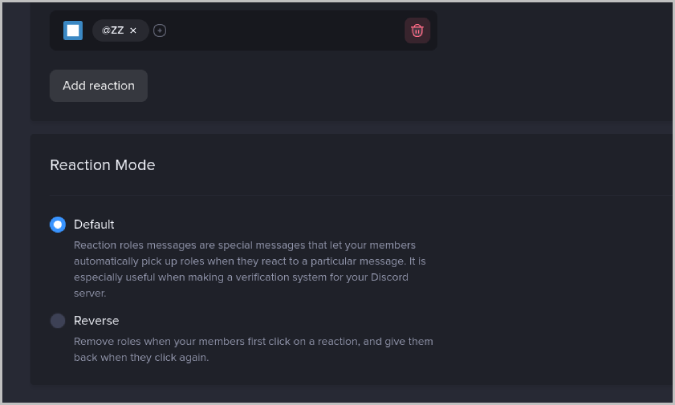
15. In the Reaction Mode section, select Default. If the user selects a reaction, they will get assigned the roles associated with that reaction in the default mode. Whereas in the Reverse mode, the role will be removed when users click on a reaction.
16. Finally, click on Save changes.
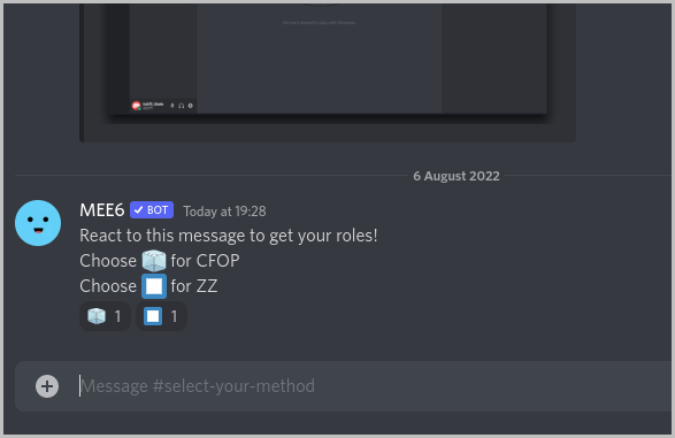
That’s it, you have successfully created a way for users to assign roles to themselves on the Discord server. You can open the server and go to the channel and check for yourself.
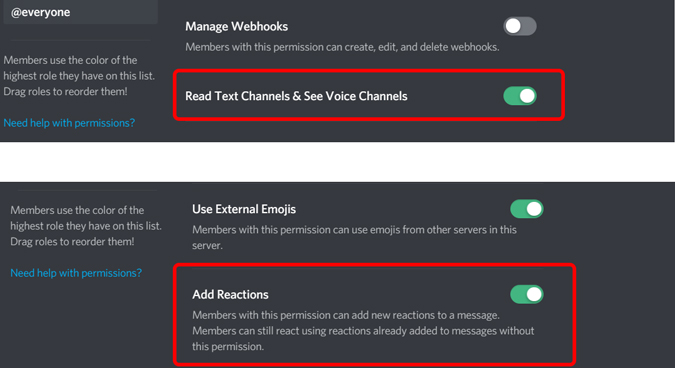
17. But, there is one last step to make sure that everyone can see that message. Open Server Settings > Roles and make sure Read Text Channels and Voice Channels are turned on. And also make sure to enable Add Reactions in the everyone roles settings.
Alternatively, You Can Also Use ProBot
ProBot is another Discord bot like MEE6 bot that will allow you to allow your server members to self-assign their roles on your server.
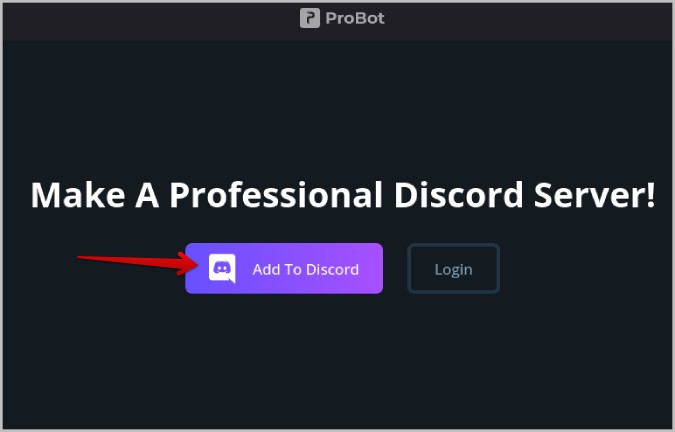
1. To set up ProBot on your Discord server, open the ProBot website and tap on the Add To Discord option.
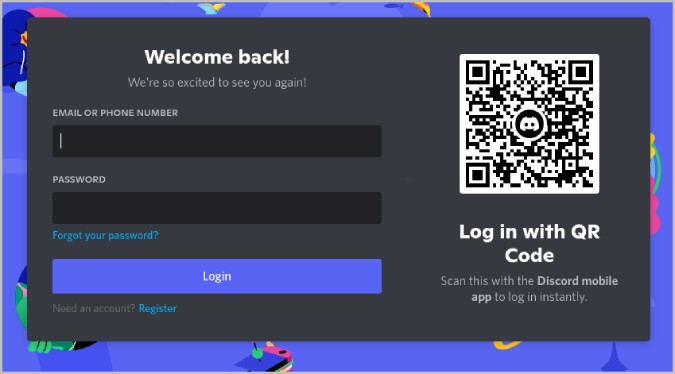
2. It will open a pop-up window. Simply log in to the service with your Discord account.
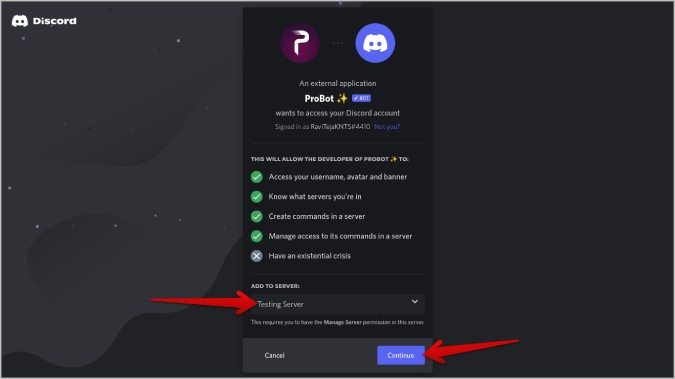
3. Once done, select the server that you want to add ProBot to and click Continue.
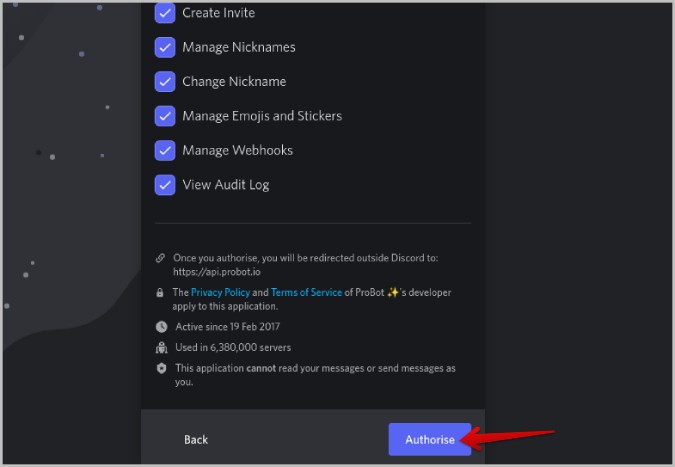
4. Then click on Authorize which should close the pop-up window.
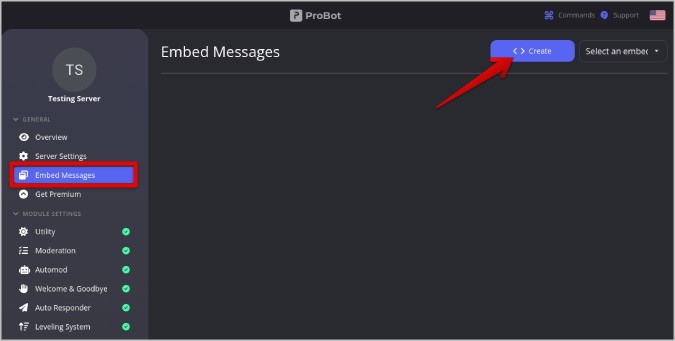
5. Now, you will be redirected to the ProBot dashboard, Here click on the Embed Messages option in the sidebar.
6. Now click on the Create option at the top to create a new embedded message.
7. Give your embedded message a name and then click the +Add Field option to add title, content, image, etc.

8. Add the required fields explaining the roles in your server to the new users.
9. Then click on the Send New Message button at the bottom.
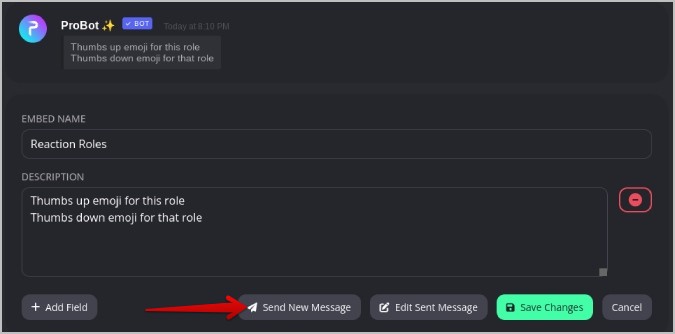
10. In the pop-up, select the channel and then click Send New Message. This message will be sent as an Embedded message in the selected channel.

11. Once done, click on the Save Changes button.
12. Now click on the Reaction Roles option in the left sidebar and then click on Add Message.
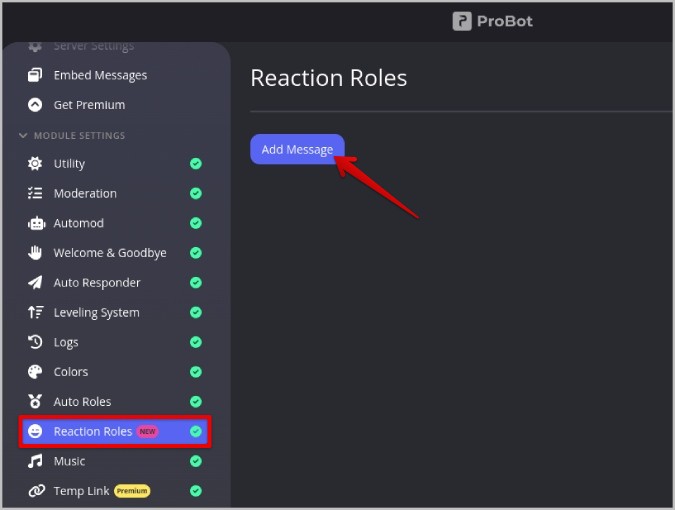
13. Now under the Embeds section, select the embed that you just created in the step above.
14. Then under Choose a message, select the message that you just sent.
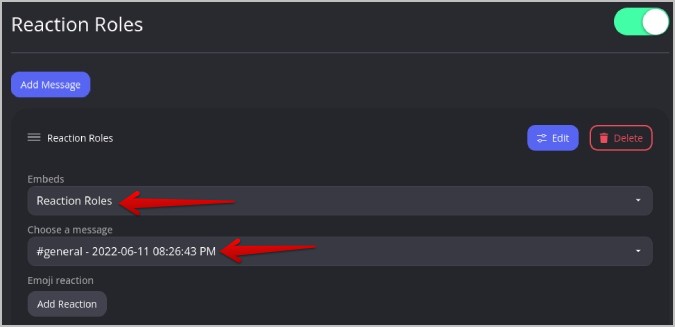
15. Then under Emoji reaction, click on Add Reaction button.

16. Select the emojis that represent the roles on your server. One emoji for each role.
17. Once selected, you should see emojis below with a plus icon beside them.
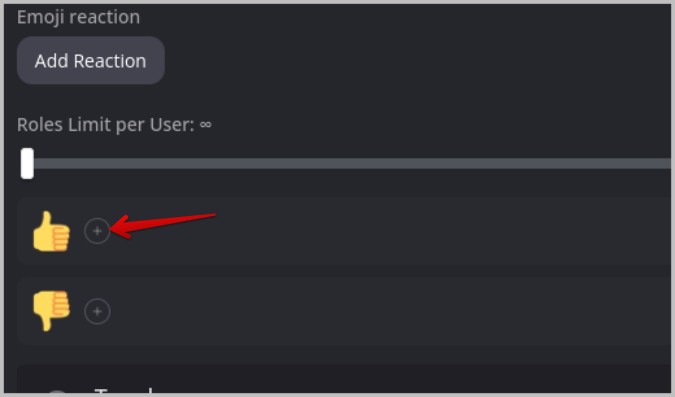
18. Click on the plus icon and select the role, if the user chooses that emoji, they will be assigned that role automatically on the Discord server.

19. Once done, click on Save Changes.
Now users can hop on to that channel or you can set it as a welcome channel. Users will then have to just click on the emoji reactions for that message to join the respective server.
Giving Users Option to Self-Assign Their Roles on Discord
Both MEE6 and ProBot can get the work done. Both are multi-purpose Discord bots, both have many similar features to compete with, and both are user-friendly. Another option is Carl Bot which also features the reaction roles function. So if you are using any of these three bots, you can continue using that instead of installing a new bot just for reaction roles as all three offer a similar experience.
The post How to Allow Users to Self Assign Their Roles on Discord Server appeared first on TechWiser.