GIMP is a free photo editor for computers. If you try to look for a Resize tool in GIMP, you won’t find any. That’s because it doesn’t exist. However, it doesn’t mean that you cannot resize pictures in GIMP. Whether you are looking to change the dimensions of an image or its file size, this post shall help you in resizing images in GIMP.
Let’s get started.
1. How to Resize an Image by Changing File Size
Many websites and apps have image size limitations. If you want to change the file size of an image, you will need to reduce its quality as shown below.
1. Open the image in GIMP by going to File > Open.
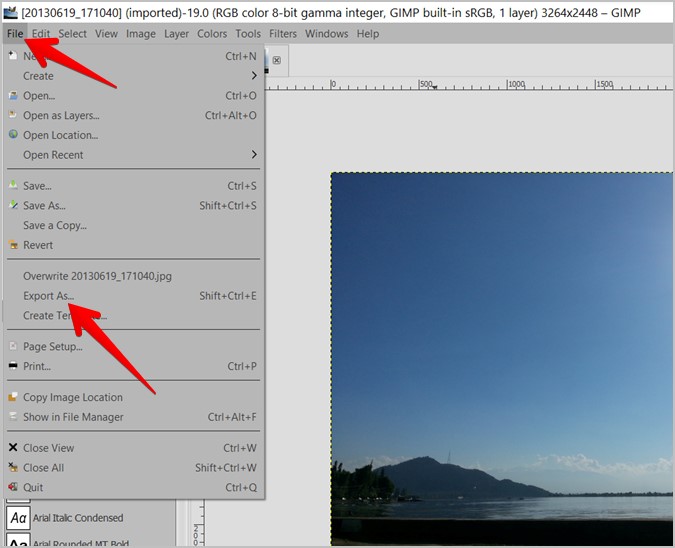
2. When the image opens in GIMP, go to File > Export as.
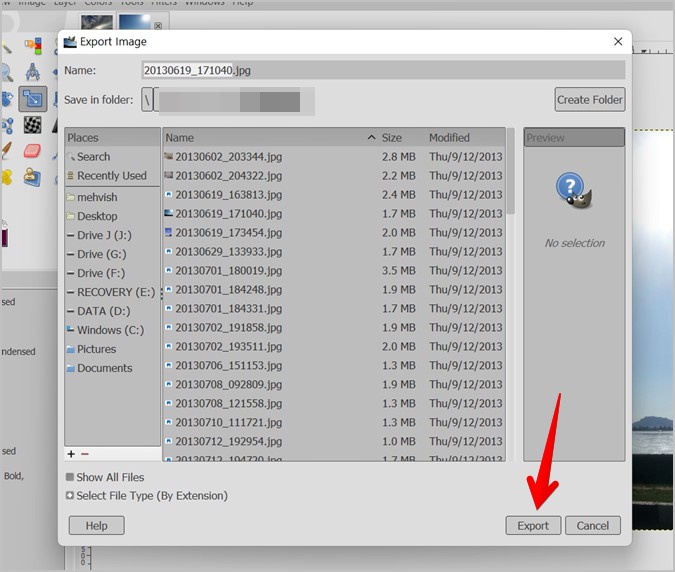
3. The Export image dialog box will open. Type a name for the image (or use the same) and click on Export.
4. You will be greeted by Export Image window. Here you need to reduce the value of the Quality option using the slider to decrease the file size of the picture. Click on Export to save the image.
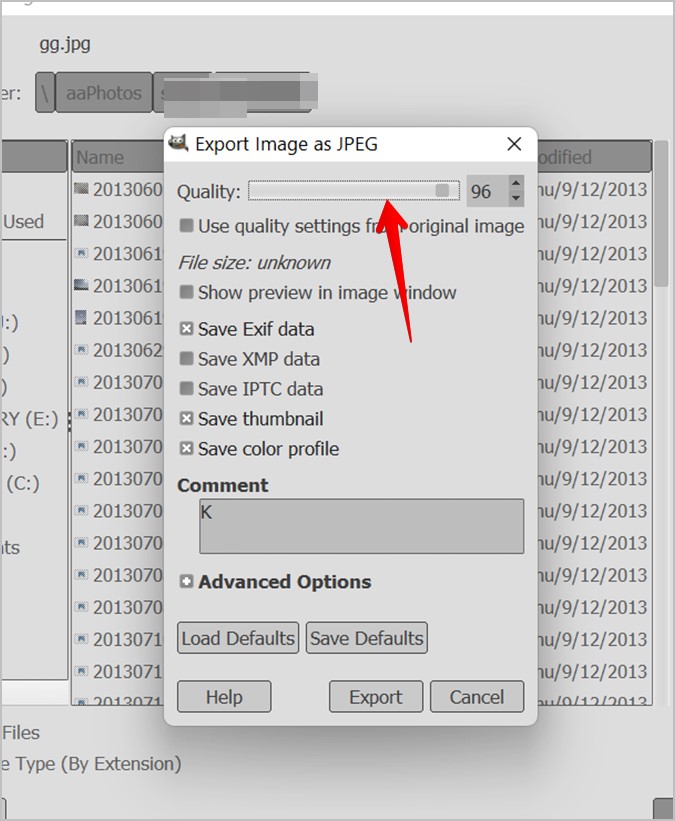
Tip: Enable the checkbox next to Show preview in image window to view the file size.
2. How to Resize an Image by Changing Dimension
You can change the resolution of a picture in three ways as shown below.
1. Using Scale Tool
To resize images in GIMP, you need to take the help of the Scale tool. Here are the steps:
1. Open the required image in GIMP by going to File > Open.
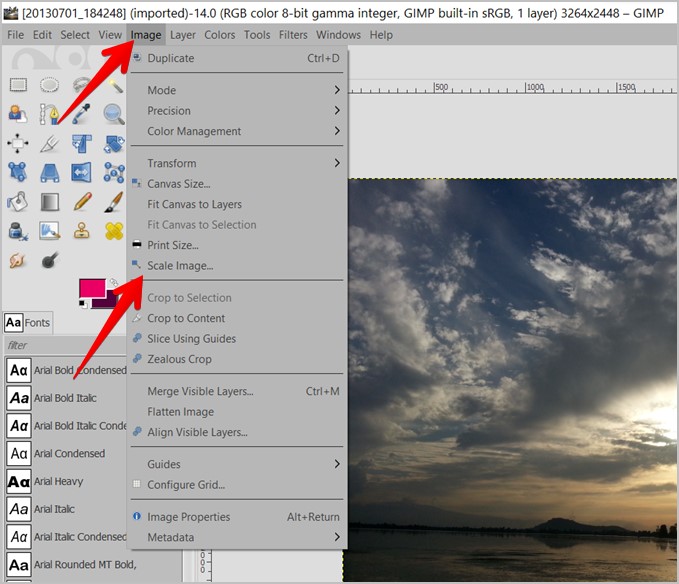
2. Click on the Image option in the menu bar and select Scale image from the menu.
3. The Scale Image window will open. Here you will get the Image Size option with two fields: Width and Height. The default size is shown in pixels. If you want to view it in a different format, click on the px drop-down box and choose from percent, inches, etc.
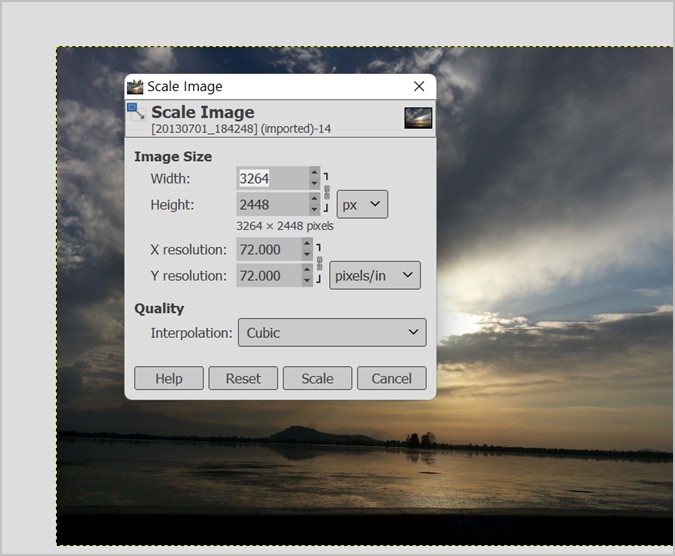
Enter the required image dimensions in the Width and Height fields. If you want to decrease the size of the image, enter dimensions lower than the current number. Similarly, if you want to upscale the image, enter a larger value. Please keep in mind that upscaling may result in a loss of image quality.
Another thing that you need to keep in mind is to lock the aspect ratio. By doing so, if you change one value (width or height), the other value will change accordingly, resulting in an image that will not stretch or compress in a strange manner. The Aspect ratio is locked by default. To verify, check the chain icon next to the Width and Height boxes. It should be locked. In case it isn’t, click on the chain to lock it.

Keep the Interpolation quality as Cubic. However, if you notice any distortion in the image, try other Interpolation methods. Finally, click on the Scale button.
4. To save the image with a new resolution, click on File > Export as. Type a name and select the image quality as shown in the above method.
Tip: Find out how to make a photo square without cropping it.
2. Scale Using Mouse
You can also manually resize an image with the help of a mouse.
1. Load the image in GIMP.
2. Click on the Scale icon in the toolbox or use the Shift + S keyboard shortcut.

3. Keep the Ctrl key and mouse button pressed and pull the image inwards from any corner. The image size will keep on decreasing as you compress the image. Leave the buttons at the desired size and click on Scale in the pop-up window. Similarly, stretch the image outwards to increase its size.
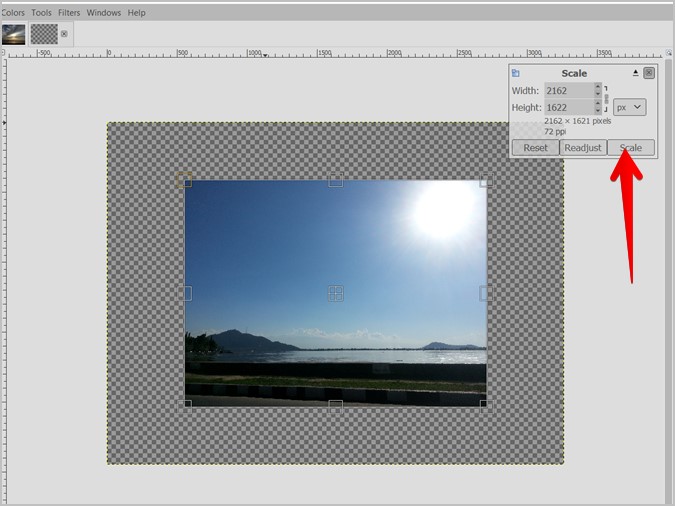
4. When you decrease the image size, you might see the blank canvas underneath. To remove it, click on Image > Crop to content.

5. Click on File > Export as to save the image.
3. Resize Layer
If you have multiple image layers, using the above methods directly will at times resize the entire image instead of just an individual layer. You can resize only one image layer with the help of the Scale tool or using the Scale layer feature. These methods can be used to resize the pasted images as well.
Note: Make sure that the selected layer is a normal layer and not a Floating layer. In case it’s a Floating layer, right-click on it in the Layer panel and select the “To new layer” option.
1. Using Scale Tool
1. Select the layer that you want to resize by clicking on it in the Layer panel.
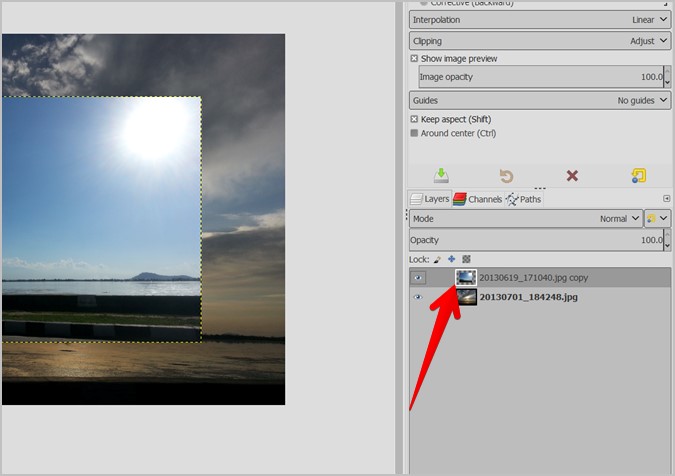
2. Once selected, click on the Scale icon in the toolbox to enable it.
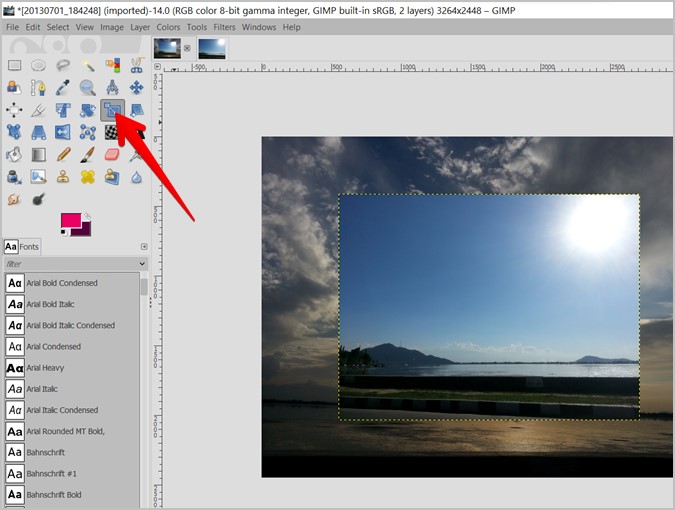
3. You will see the Scale options either on the right or left panel. Select Layer next to Transform.
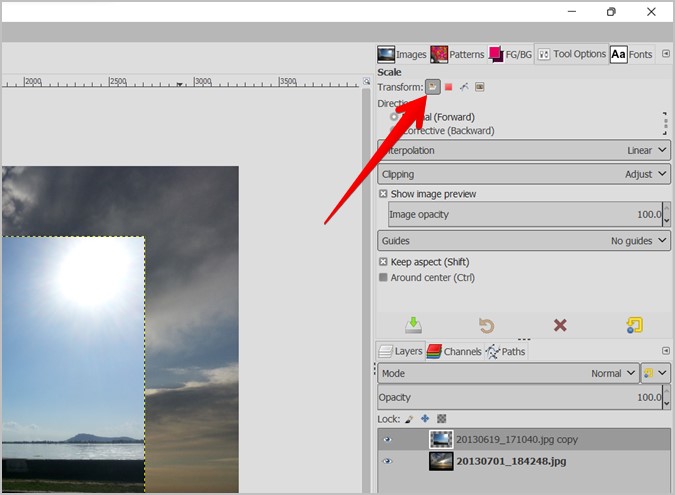
4. Now, press the Ctrl key and mouse button together and compress or stretch the image using its edges. Click on the Scale button in the pop-up window. Your layer will be resized.

2. Using Scale Layer
1. Click on the layer in the Layer panel to select it.

2. Go to the Layer option in the menu bar and choose Scale Layer from the menu.

3. Enter the new image dimensions in the available fields. Make sure the chain icon is locked to maintain the aspect ratio. Click on Scale.
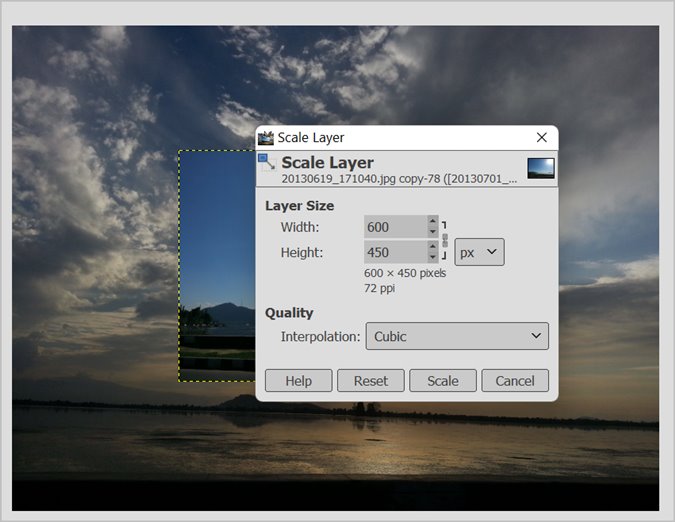
Similarly, you can resize other image layers.
Wrap Up: Resizing Images in GIMP
Resizing an image helps if it’s too small or large for a particular purpose. You can resize an image and place it anywhere on a second image, or post the same image in different dimensions on various social media platforms. Learn how to resize images in Windows 10 and reduce the file size of a PNG image.
The post 2 Ways to Resize an Image in GIMP appeared first on TechWiser.